
Step 1)
Log in using your credentials
Log in using your credentials
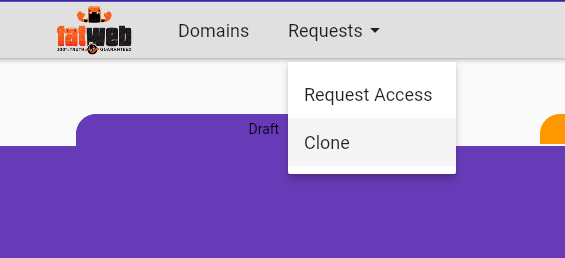
Select Requests – > Clone

In the bottom right click on the + button
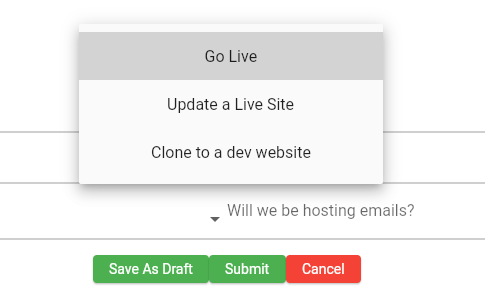
Clicking on “What do you want to do” you will see 3 options to pick from: Go Live, Update a Website, Clone to a dev website. We will start with Go Live
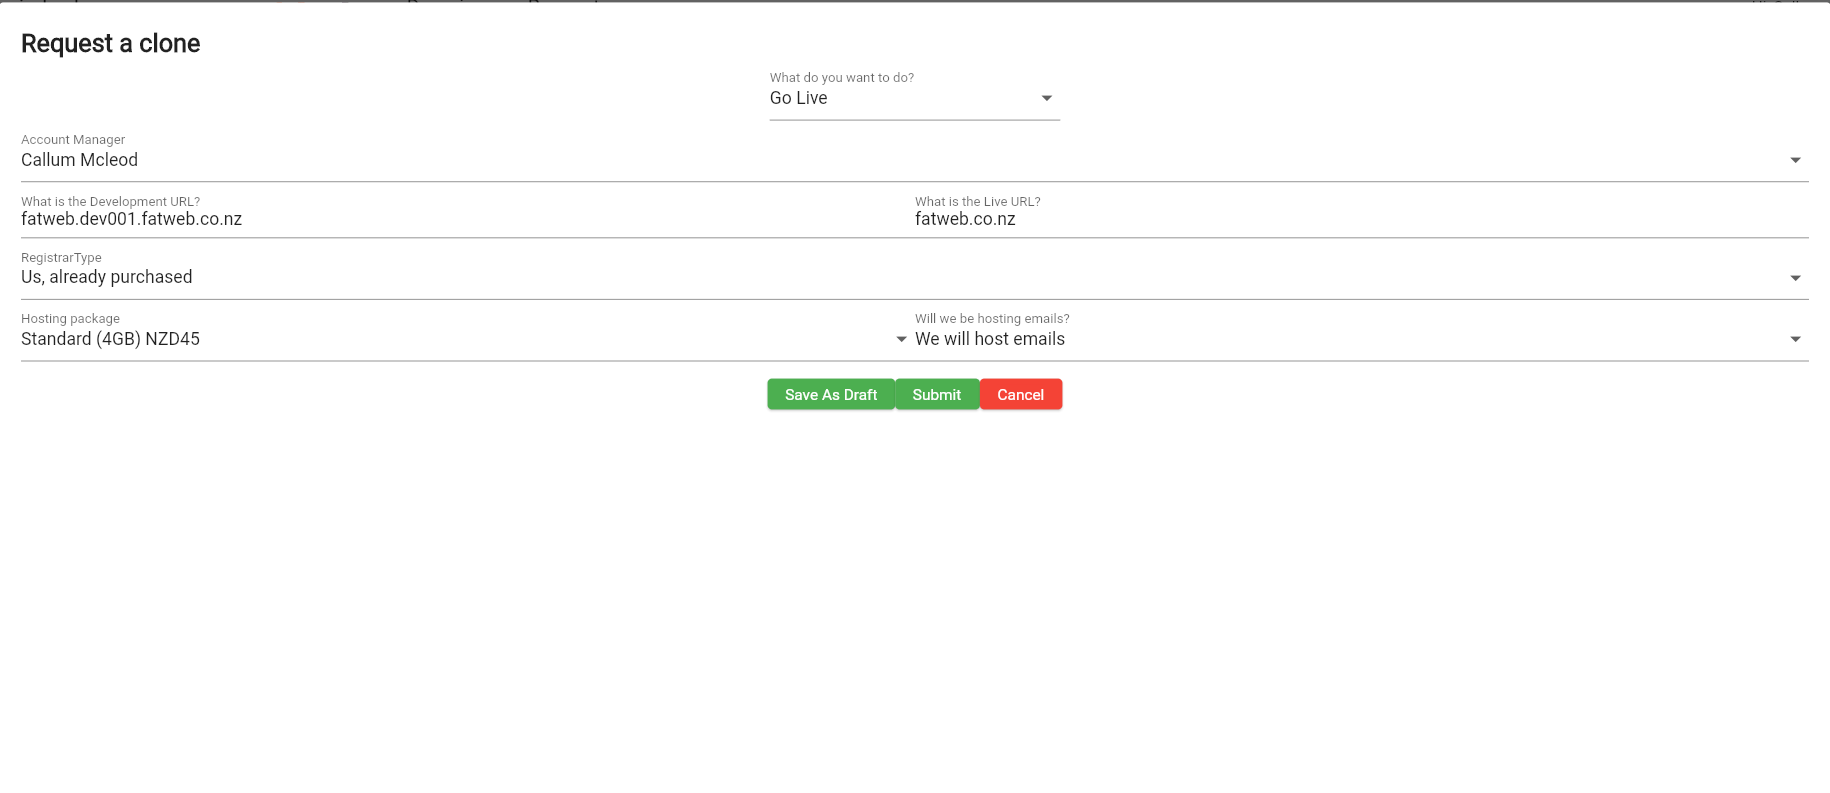
To make a brand new website live, select Go Live. Here you can assign the Account Manager, enter the development url (of the site ready to go live), enter the live website domain which the website will appear on, select the hosting package, and select if we will host emails. Once you have made your selections simply click ‘Submit’ to complete the Go Live request. If a website already exists under this domain use the ‘Update a live site’ function instead.
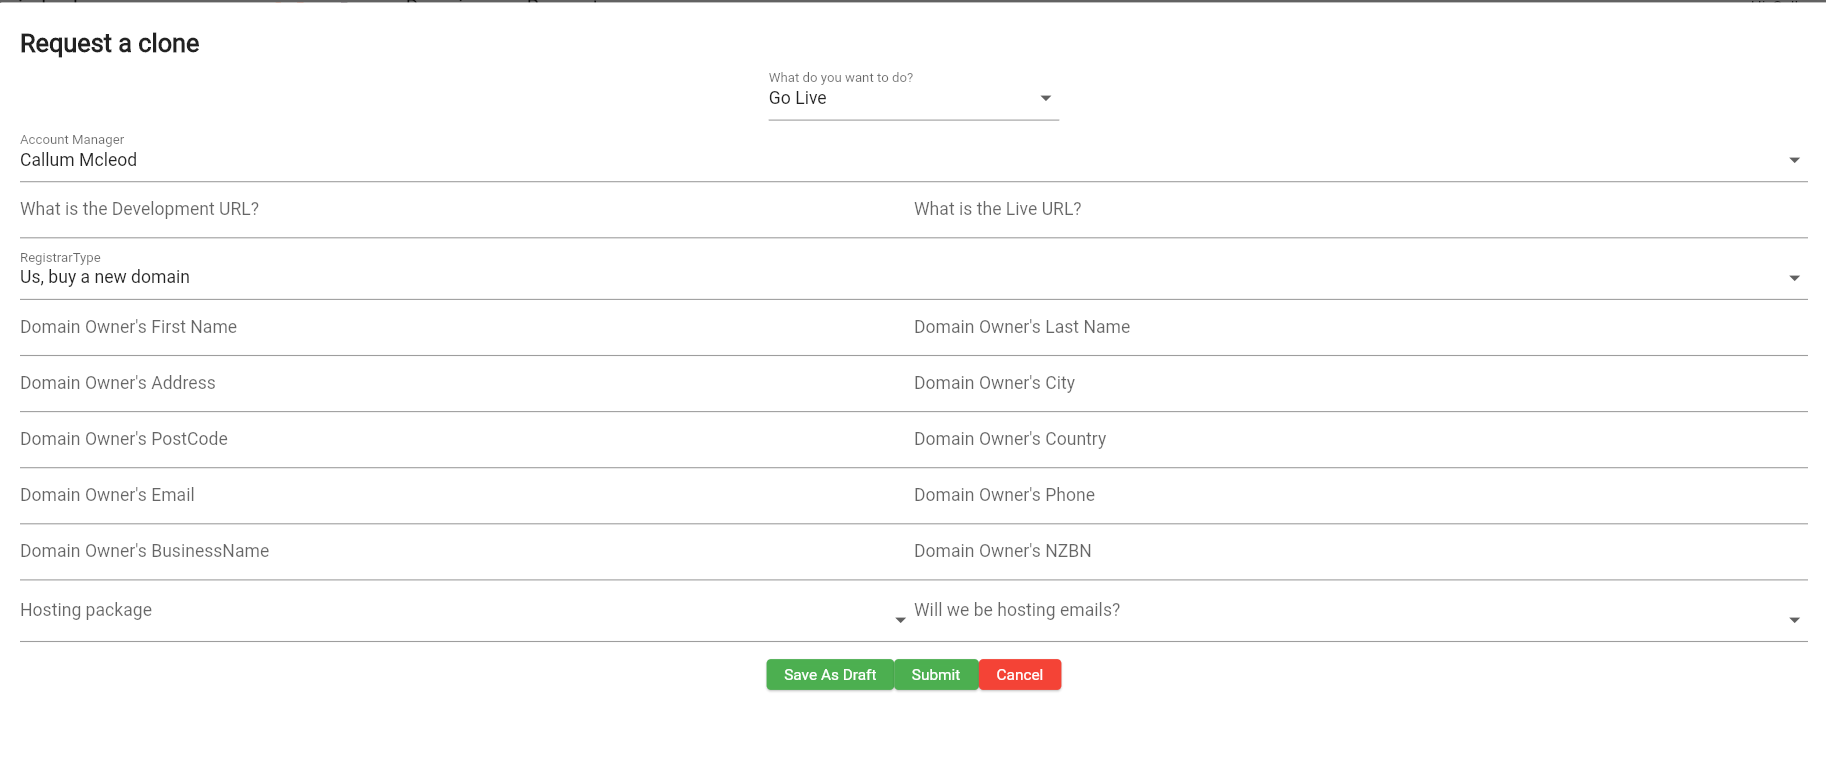
Once selecting Go Live you can select the Registrar type which has 5 options. If we need to purchase a new domain for the client, select “Us, buy a new domain” and fill out all of the domain details. If we already purchased/own the domain then just select “Us, already purchased”. If the client has purchased their own domain and wants to transfer it to us, select “Migrate to us” and insert the UDAI key (domain password).
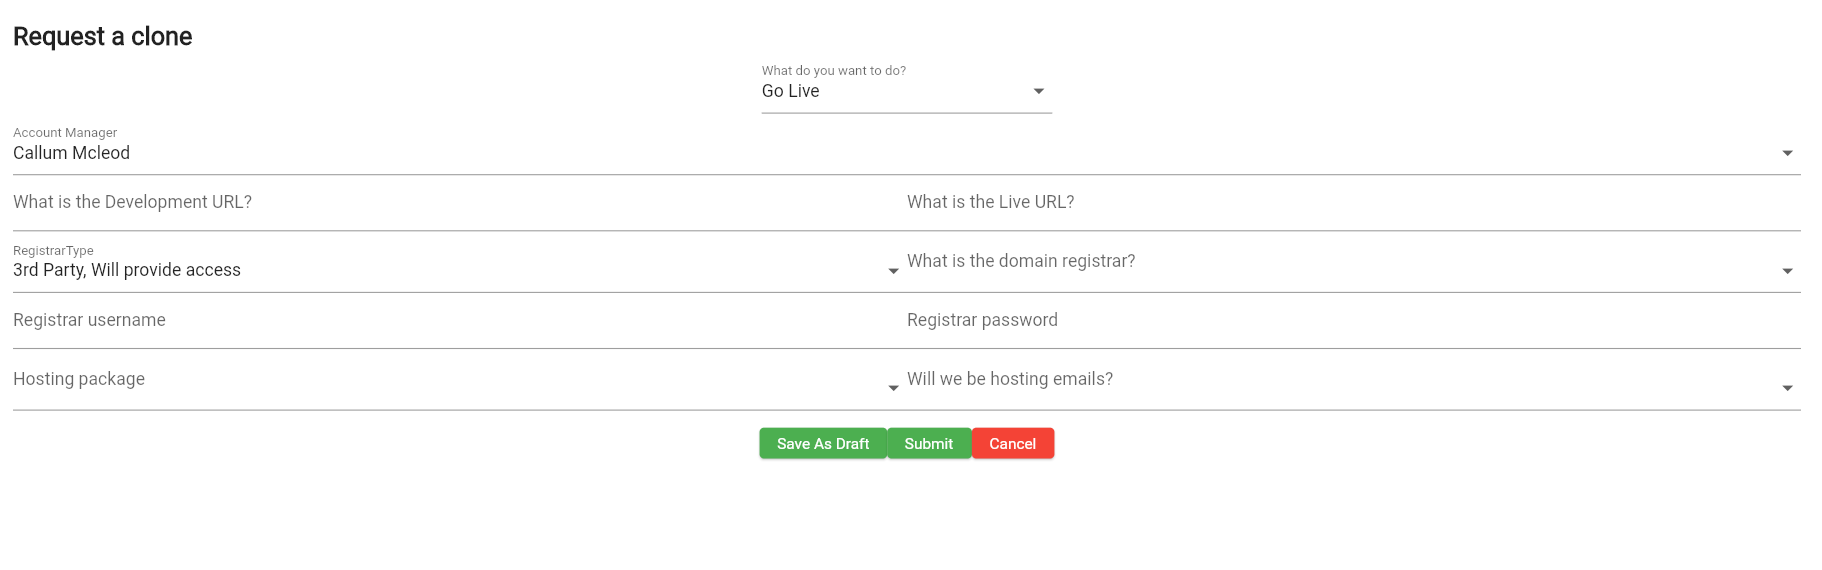
During Go Live if the client doesn’t want to migrate the domain to us they are welcome to keep it with their existing provider. To make the website live we still need to change the DNS records to point to our server. We can do this ourselves if the client sends the Registrar login, just select “3rd Party, will provide access” and enter the Registrar name as well as the login credentials. If the client doesn’t want to share these credentials just select “3rd Party, customer will change DNS records” and once the website is ready to go live you will need to send the client instructions of which DNS records to edit, this will be supplied to you by the system admin once the Go Live request is submitted.
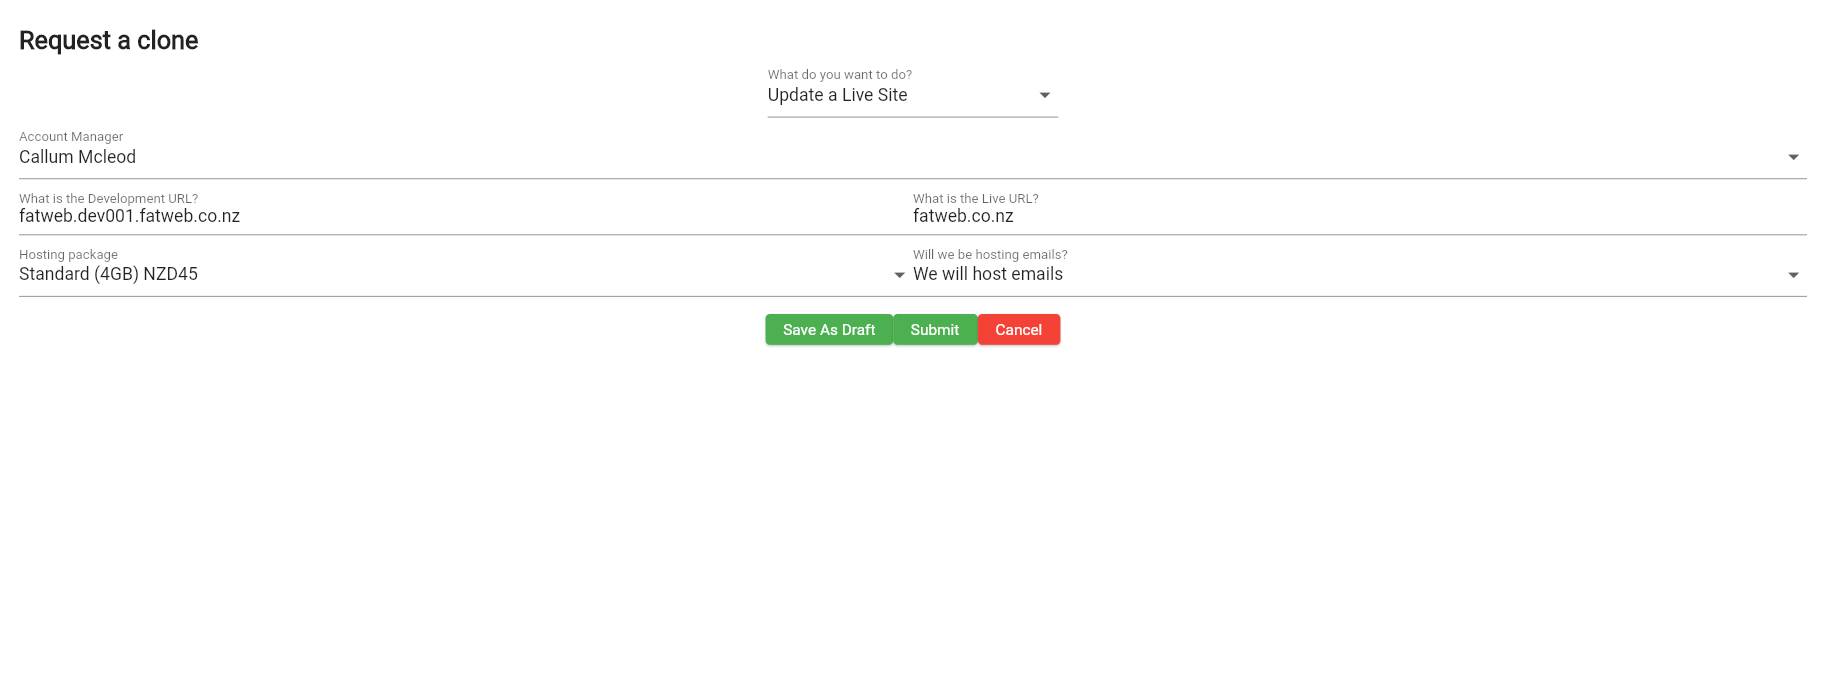
To make a website live by updating an existing website, select ‘Update a Live site’. Here you can assign the Account Manager, enter the development url (of the site ready to go live), enter the live website domain which the website will appear on, select the hosting package, and select the email package if it has changed (this will be automatically populated). Once you have made your selections simply click ‘Submit’ to confirm the request.
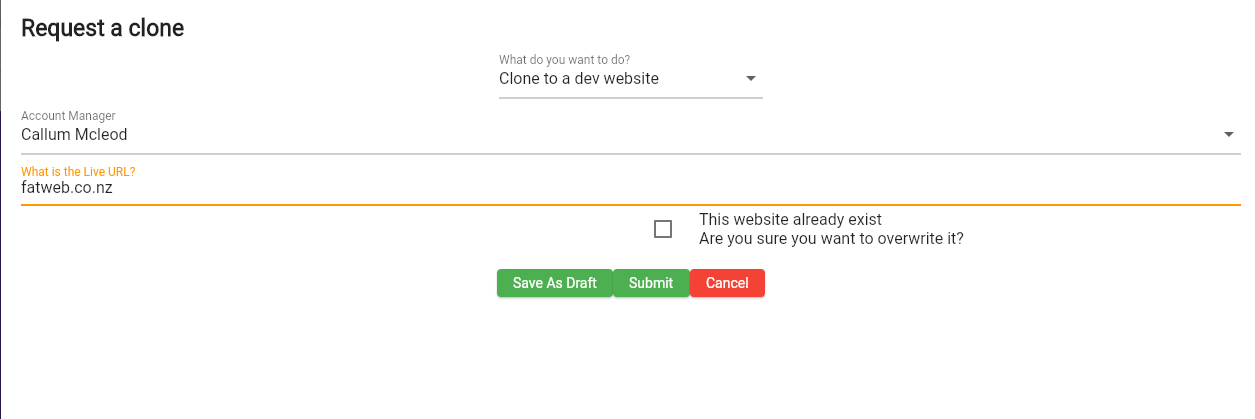
To clone a current website onto a dev link (e.g. for building a website or for applying maintenance) select the ‘Clone to a dev site’ option. Here you just need to select the account manager, and the url for the website you want to clone. Then just click Submit.
Once your request is submitted you can view the Pending and In Progress tabs to see when the clone has been completed.